
Looking for form errors? Click here
Forms are a great tool to collect, review and save data from clients.
To help get you started we have added some form templates in Engager for you including Onboarding Forms and Self Assessment Tax Questionnaires.
How to use Forms
Forms are a great tool to collect, review and save data from clients. We’ve also tried to make your start to life with Engager even smoother by adding in some of our own such as Self Assessment questionnaire and Onboarding forms for your new clients.
Key things to note about the power of forms - you can send these directly to clients and they respond via their portal, so nice and secure but also, the answers can be mapped and saved directly onto the client’s account saving you time having to copy and paste
Here’s a preview of our pre-built Self Assessment Tax Return Questionnaire that we’ve made available for you to use - as with all things Engager, feel free to customise as you go

Bulk Sending Forms
Need to contact multiple clients for their information or capture their Self Assessment information? Then use Bulk Sending Forms.
If you're looking to do this for Self Assessment specifically, read our comprehensive guide - https://help.engager.app/hc/en-gb/articles/22045284231570-Self-Assessment-Service-Forms-Payment-Reminders-Payment-on-Account-and-Automation
Sending Forms to Clients
Once your Self Assessment Form is ready, you can send it to clients in two ways:
1. Sending Forms Individually
- Navigate to Clients and select Form Requests on the left menu.
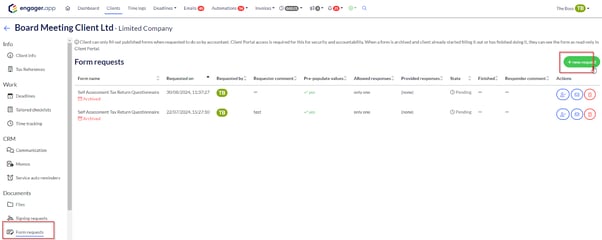
- Complete the form request as usual to send it to the client.
2. Sending Forms in Bulk
For a more time-efficient approach, send forms in bulk. Here’s how:
-
Filter Your Client List:
- Navigate to your Client List and select Filters.

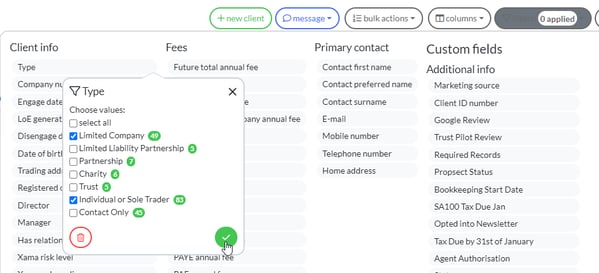
- Filter by Type (e.g., individuals or limited companies).
- Filter by Enabled Services, selecting SA100.
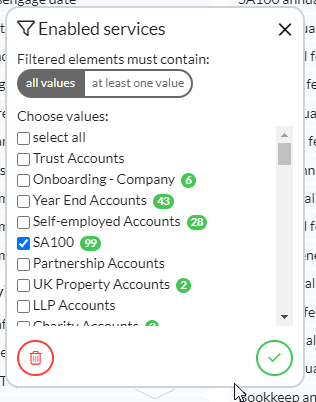
- Navigate to your Client List and select Filters.
-
Select Clients:
- Once your filters are applied, the list will display only clients with the Self Assessment service enabled.
- Use the top-left checkbox to select all filtered clients.

-
Create Form Requests:
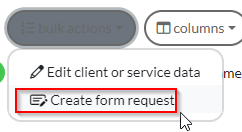
- Click Bulk Actions in the top-right corner and choose Create Form Request.
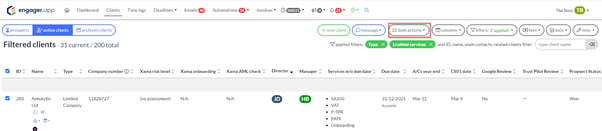
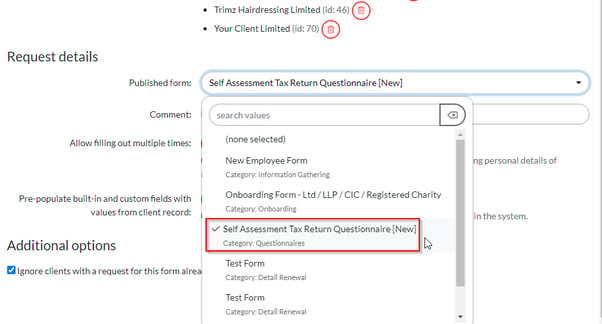
- In the Published Form field, select the Self Assessment form you want to send.
- Click Bulk Actions in the top-right corner and choose Create Form Request.
-
Adjust Settings:
- Turn on Pre-Populate built-in and custom fields with values from the client record to streamline form completion for your clients.
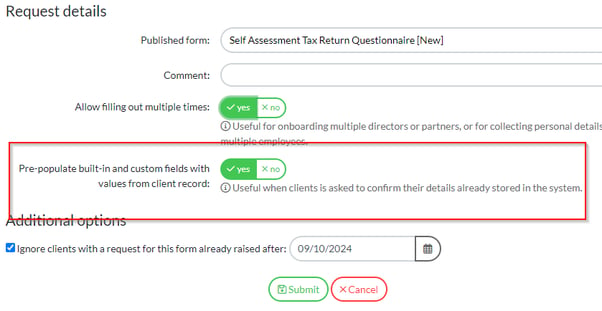
- Enable Ignore Duplicate Requests to avoid sending forms to clients who already received one after a specific date.
- Turn on Pre-Populate built-in and custom fields with values from the client record to streamline form completion for your clients.
-
Notify Clients:
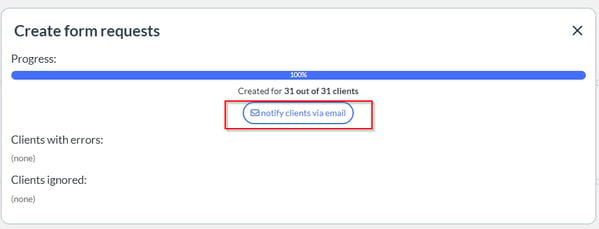
- After submitting the form requests, notify clients via email by selecting Notify clients via email.
- Compose your email, and you can even include instructions for uploading details about self-employed earnings, expenses, or property income.
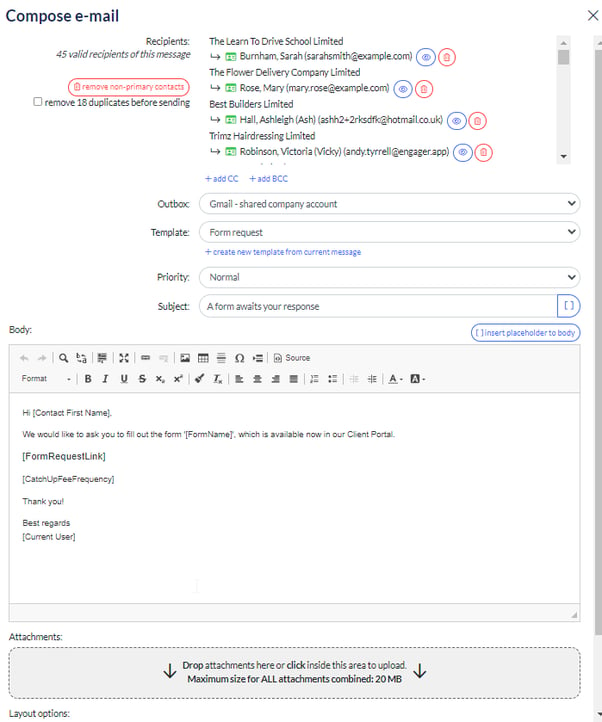
- After submitting the form requests, notify clients via email by selecting Notify clients via email.
-
Send the Emails:
- Hit Send, and you’ve successfully emailed your entire Self Assessment client base in just minutes!
Key Takeaway: Bulk sending saves significant time, allowing you to reach all your Self Assessment clients in minutes.