
Automated emails are the ability for Engager to create and send emails based on email templates at a time and frequency outlined by the user in the settings.
There is a recorded video below walking you through this process.
Automations in Engager.app are a powerful tool designed to help you manage routine tasks efficiently, allowing you to focus more on strategic activities within your accounting or bookkeeping practice. This guide will walk you through the basics of setting up and using automations, including practical examples and best practices to ensure you get the most out of this feature.
What Are Automations?
Automations are predefined tasks that Engager.app can execute on your behalf, reducing the need for manual intervention. These can range from sending routine emails to updating clients on their project status. By leveraging automations, you can ensure consistent communication, meet deadlines, and free up time for other important tasks.
Getting Started with Automations
How many hours a week do you think you spend manually sending emails to clients? Make this a thing of the past with our Global Auto Reminders.
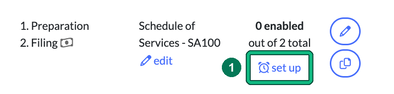
- Head over to Settings > Jobs > Services, find the relevant service and select set up under Global auto reminders.
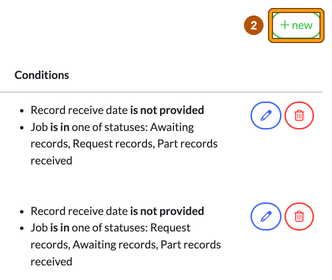
- Select + new. You will be able to start programming your automations.
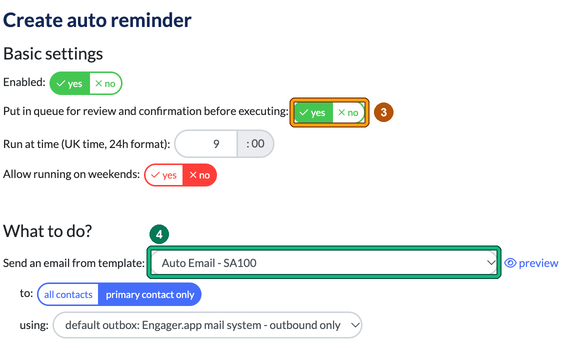
- Top Tip: whilst you’re getting used to us, we’d recommend putting the automated emails into a queue for you to review when ready, before being sent out to your clients. So when you’re onboarding and importing your client list, this is a great control so that your clients aren’t met with a barrage of unnecessary emails.
So in Basic settings, make sure Put in queue for review and confirmation before executing: is set to yes. This is the default. - Now follow the flow, selecting your relevant template and who you want the email to go to. Under What to do?, choose your newly created template from earlier in Send an email from template:. You can even preview the template selected with the preview link. Then choose to: all contacts or primary contact only.
- Under When to do it?, set how long before the statutory deadline the email goes. In this example, we’re looking at Annual Accounts and your Year End process, so I want my template to go 9 months before the statutory YE filing deadline, so I’ll enter 9 in months before statutory deadline (next due date). To run on the same day as the due date, set all the values to zero.
Now this email template could be something like ‘great news, your accounting year has just finished, we’re looking forward to preparing your accounts and getting these filed ahead of your deadline. Before we can do this, we need bank statements / WIP’. You get the picture. This could be a one off email. - That’s a great start, but we know what clients are like. They need constant reminding and badgering, so let’s set up a ‘chaser’.
Now this email could be ‘we sent you a request for bank statements / WIP etc, please upload your bank statements into your portal’.
Now we want this to go monthly until we actually receive the records required. Tick Repeat sending the email: then enter your parameters in every: and until:. In this example, every 1 month.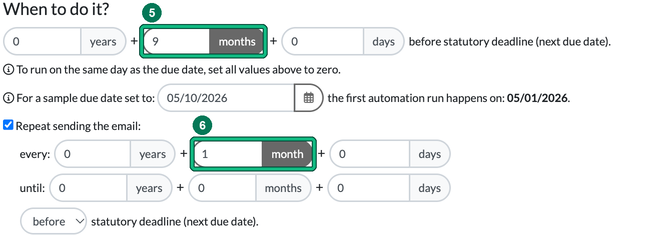
Automations are scary
This is great, but how do we control this? How can we make sure that we’re not spamming our clients with unnecessary emails when they’ve perhaps sent us the required documents?
This is where your conditions come into play. It’s important to note that these conditions are linked to your job statuses.
So if your job cards aren’t up to date, you must do a little house keeping beforehand, once you’ve got your clients imported.
- Under Under which conditions?, choose your Optional conditions, such as 'Record receive date' value and Job status is one of the following, then tick the statuses you want.
- Select Save.
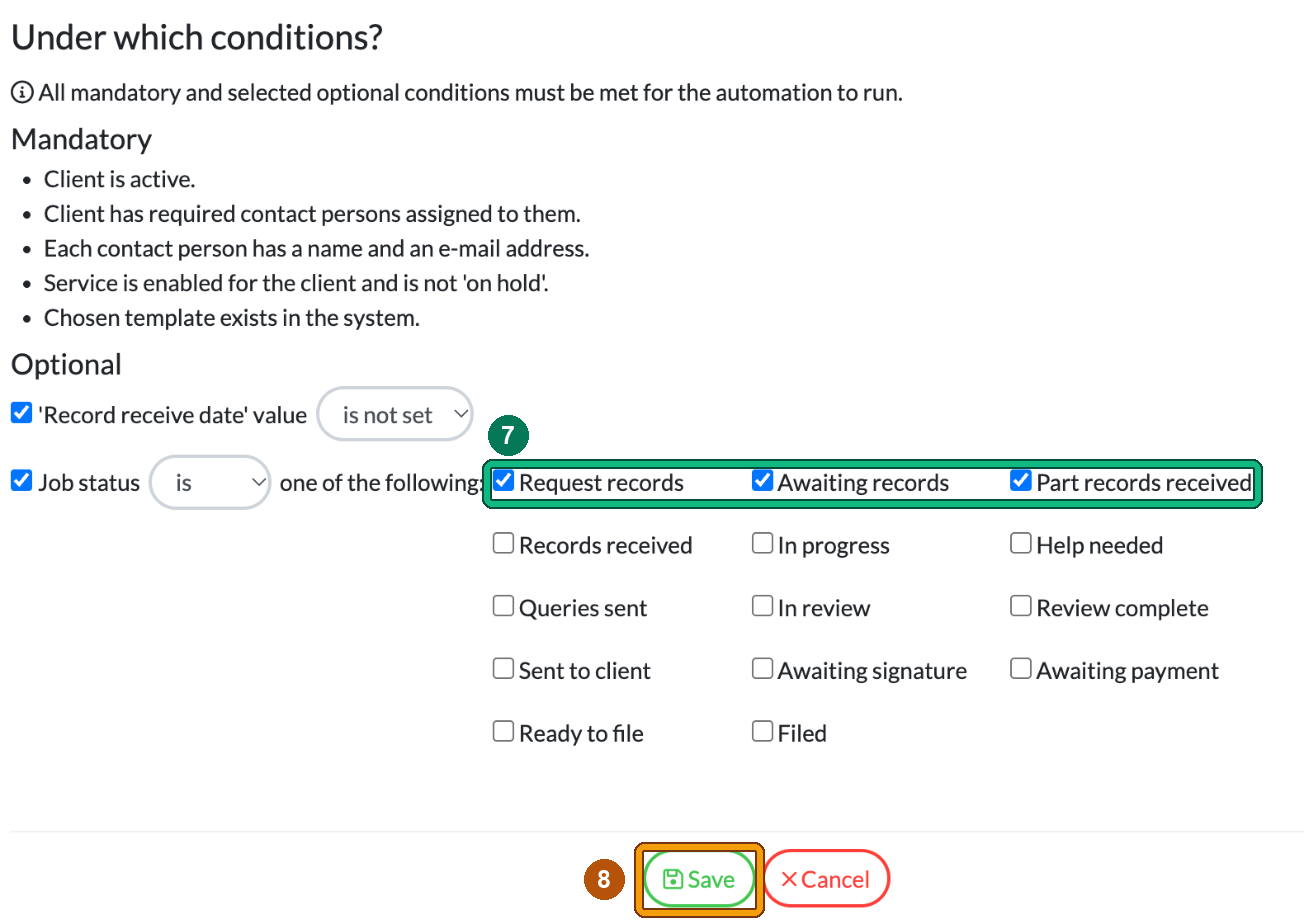
So in our example, the system is going to remind our clients, every month, that they need to send us the required documents, until the job card status is no longer ‘Request records’, ‘Awaiting records’ or ‘Part records received’.
This ‘job’ will stop once the status moves on, for example to ‘Records received’.
This is a quick way of getting your statutory deadline management system up and running, but you can get creative with it. You can have layer upon layer of automations running on EACH service that you have enabled in the system.
For example, people often set up their Year End reminders with different templates sent out at different times, based on different conditions.
Remember to play with this as much as you like until you’re comfortable.
Common Questions
Why aren’t my emails being sent to my client?
First thing to check will be to head to Automations across your top bar.
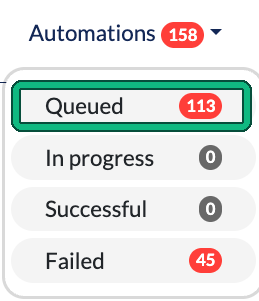
Remember, we’re giving you control over the automations so more than likely, the emails are sitting there as Queued, waiting for you to review them. This is a common occurrence while you get used to the system.
When you select Queued you’ll be taken to the Automation queue. From here you can preview, edit, apply or delete each email. Great for catching any last minute amends required.
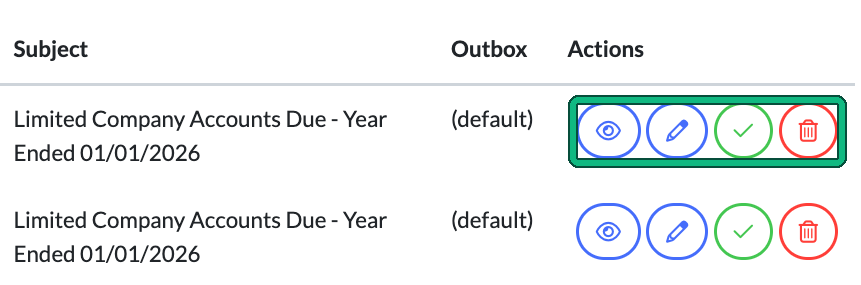
If you don’t want a specific automation to be queued, here’s how you turn it off so the job will run without interference:
- Go back to Settings > Jobs > Services, find the relevant service and select set up under Global auto reminders.
- Find the relevant automation and select its pencil icon to open Edit auto reminder.
- Change Put in queue for review and confirmation before executing: from yes to no.
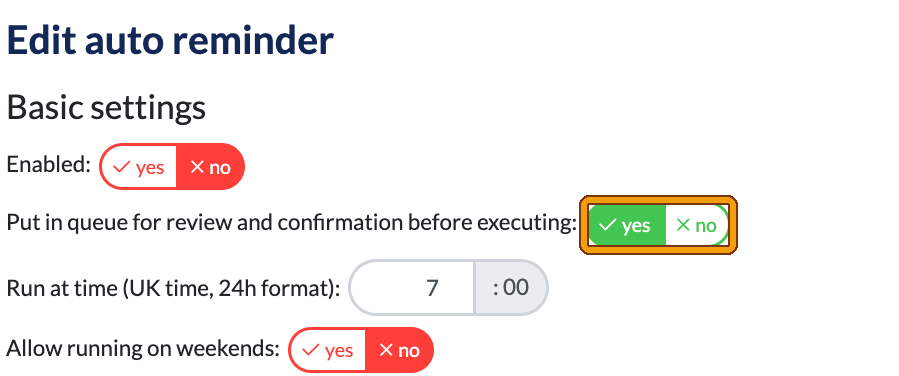
You have complete control over all automations and behaviours, so spend some time getting used to the functionality.
Why has the email failed?
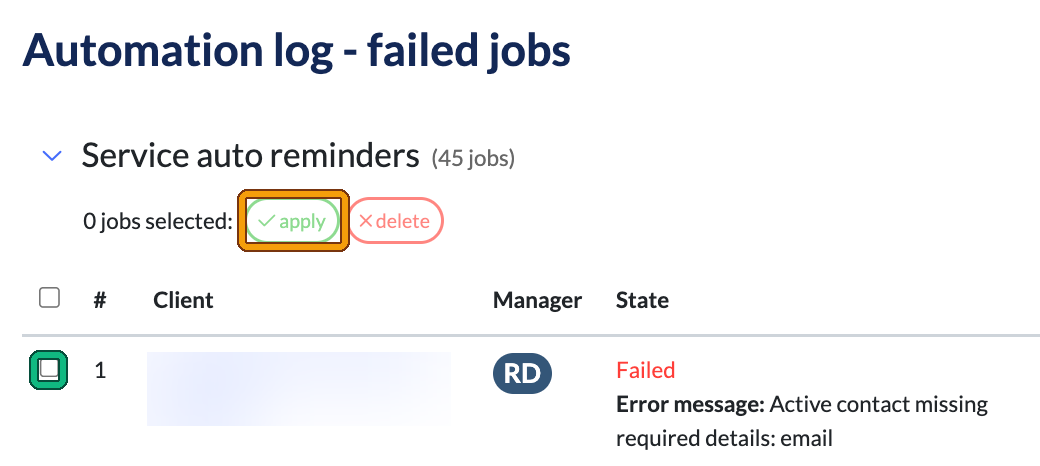
Failed emails are listed under Automations > Failed, with the reason shown as an Error message:. 9 times out of 10, it’s a simple case of an incorrect email being entered. It could be that there’s a comma at the end, or a stray character that needs to be removed from the client record. Head to the client record and check the email address.
Once you’ve corrected it, go back to Automations > Failed, tick the failed email you want to resend, then select apply. This retriggers the automation.
Syncing your email with Engager
The most effective Engager users are in their platform on a daily basis. They’re checking deadlines, they’re setting up reminders and automations, progressing jobs and tasks, but they’re also using Engager as their method of communication.
Emails in and out, all through Engager, so we encourage ALL users to sync their Microsoft 365 account or Gmail to Engager. Your emails will start filtering through and it’s a 2-way connection, so anything sent via Engager will appear in your native email provider.
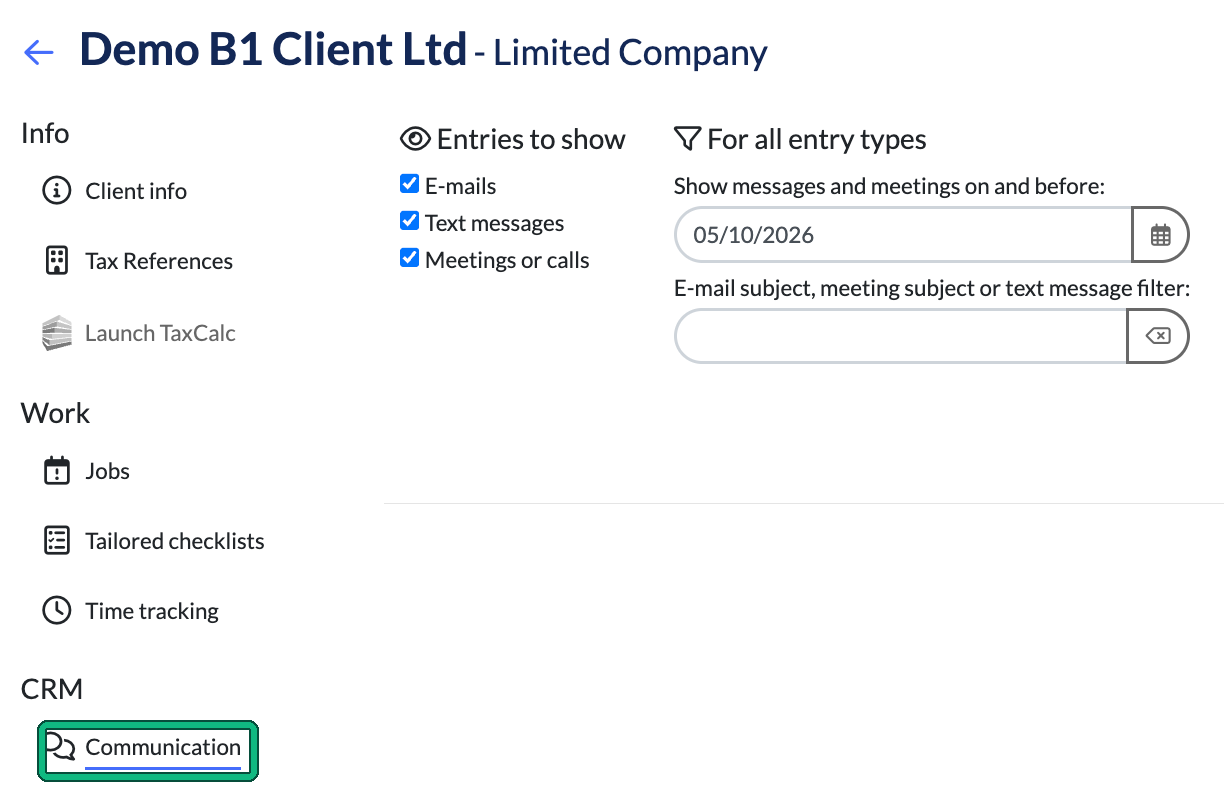
Once it has all been synced you can even see an audit trail of all email / text comms sent out via Engager. To see this, locate your client in question, then in the left-hand menu select CRM > Communication.
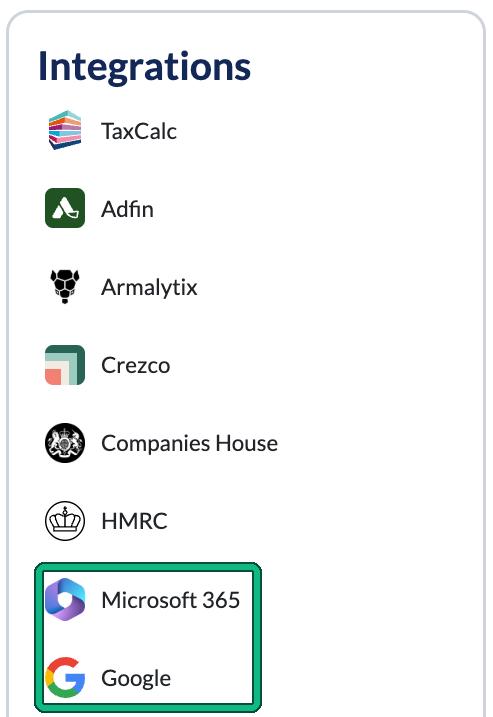
So let’s get this set up. Head to Settings > Integrations and select Microsoft 365 or Google.
You can link a personal inbox that only you will see (Personal company mailbox) and a shared inbox every user sees (Shared company mailbox). Select which mailbox you wish to authorise, then select authorise and follow the Microsoft login process. Do this a second time for the shared mailbox.
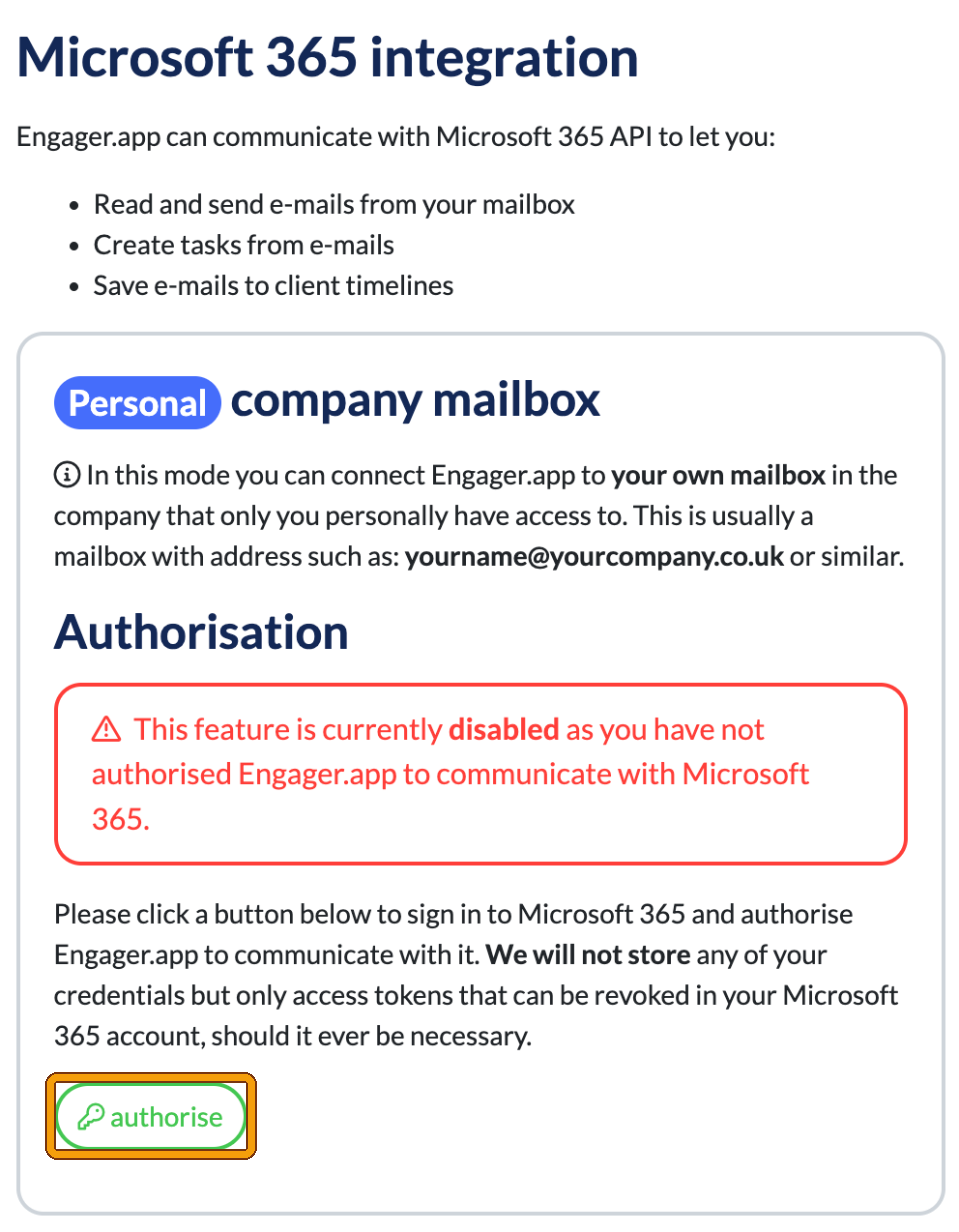
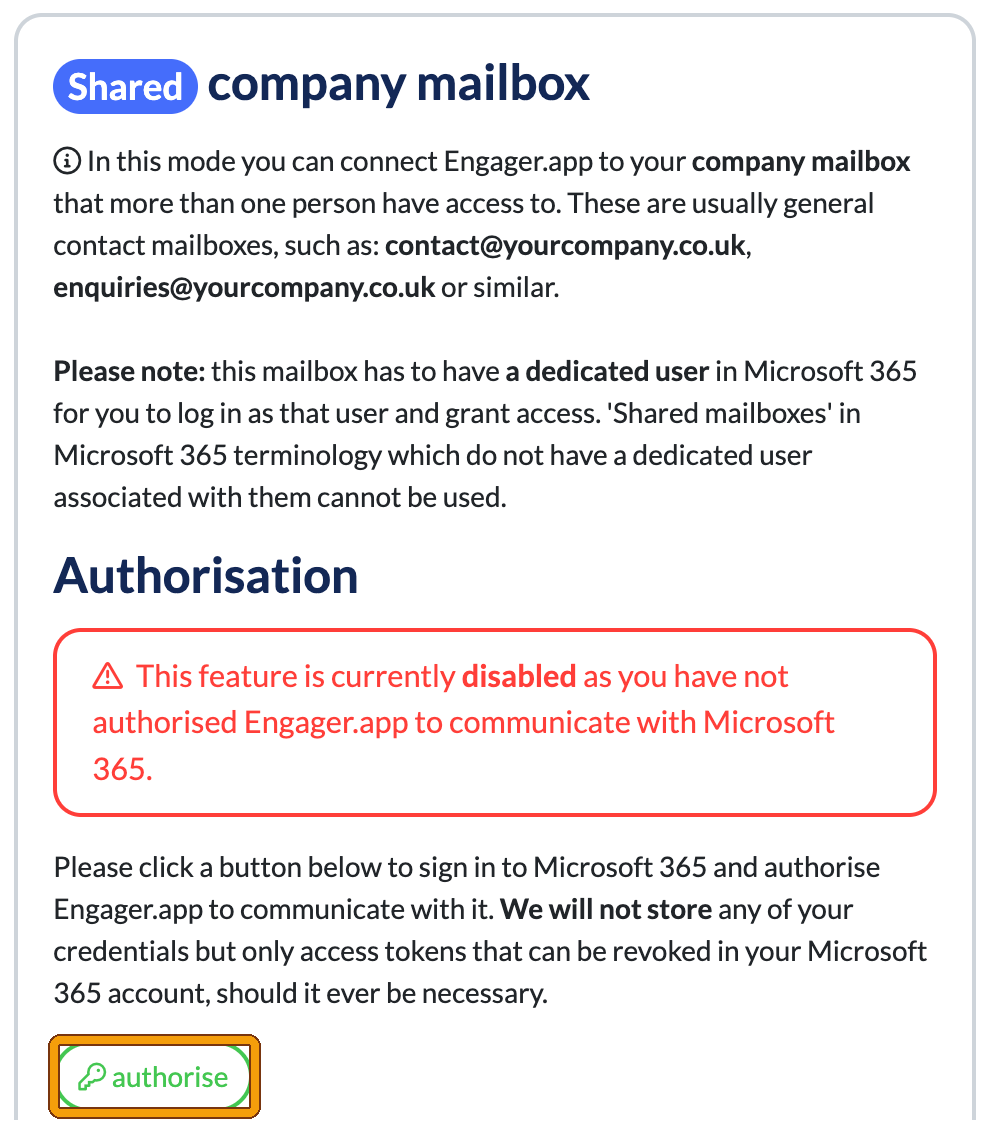
Note: you may find it best to link your personal mailbox, then log out of Engager, open a private browser, log in to Engager, then authorise the shared mailbox, because Microsoft can remember you and cause some issues.
Email syncing: Common Questions
If I sync my personal mailbox, will other staff members see my emails?
Absolutely NOT. These remain private.
My Automated Reminders aren’t being sent? Can I have automations from a personal mailbox?
Automations and Template emails will only ever be sent from a Shared Mailbox, not a personal mailbox.