
We know that it’s often difficult juggling a busy practice with numerous staff members all operating on different apps and software so we’ve developed a way to bring all of your communication together into one space within Engager.
With Engager, you can integrate your Gmail or Microsoft 365 email accounts meaning that your client and internal communication is all in one space.
How many times have you seen a client email go missing in a ‘shared inbox’? How difficult can it be to see whether a client has received a deadline reminder? We’ve brought everything together in one place, so let’s get this set up.
Getting Started
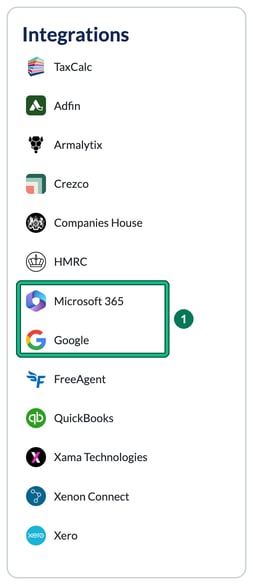
- Head over to Settings > Integrations and select your email provider, Microsoft 365 or Google.
- Once selected, you will need to provide authorisation to Engager. Each provider page has a Personal company mailbox and a Shared company mailbox. Until you authorise a mailbox, it shows that the feature is currently disabled. Select the green authorise button for the mailbox you want to set up.
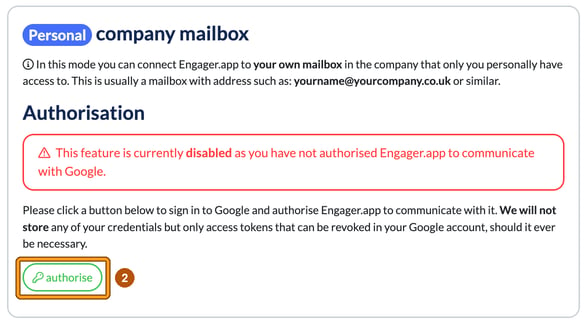
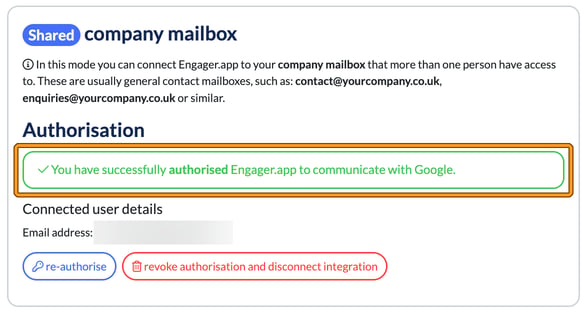
In the example above, you can see that my Personal inbox hasn’t been authorised and set up, but my Shared has. Once a mailbox is authorised, you can re-authorise it or revoke authorisation and disconnect integration.
The Microsoft 365 integration page has the same two mailboxes, each with its own authorise button.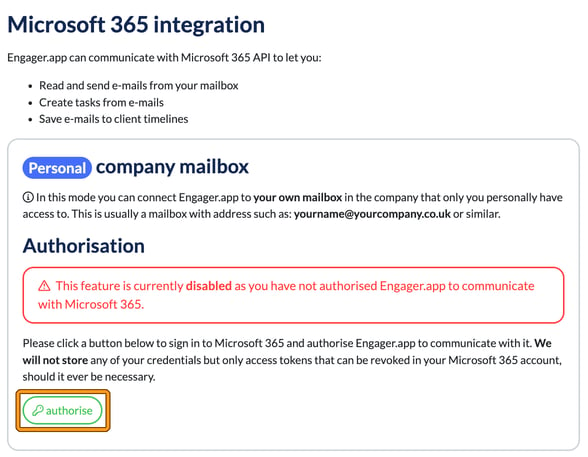
By selecting authorise, you will be taken through several screens to complete the process.
That’s it, quick and easy.
Please Note
We get asked this all the time: no, nobody can see your personal emails unless you LINK these to a client, as they will then appear as part of that client’s email history, visible via the CRM.
No, your boss cannot access your emails unless they speak directly to your IT department or domain provider.
No, you cannot have more than 1 SHARED inbox within Engager.
If you use Microsoft 365, your Shared company mailbox must have a dedicated Microsoft 365 user. Microsoft 365 “Shared mailboxes” without a user can’t be used.
Yes, all staff members can sync their personal work addresses to Engager.
What can be done in the emails
Folders will be imported via the Integration but please note Microsoft 365 will only pull through 10 folders, as this is their limit for a 2 way connection.
Emails sent and received in your integration will appear in Engager and sending from Engager will appear in your native provider. It’s a mirror.
Tasks: received an email that you need to act on later that week? Maybe a client’s asked you to review their accounts before the weekend.
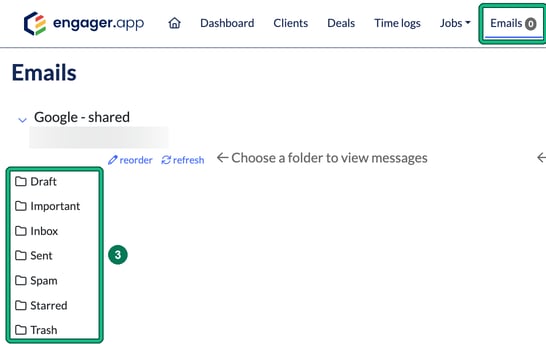
- Select Emails in the top menu, then choose a folder from your mailbox.
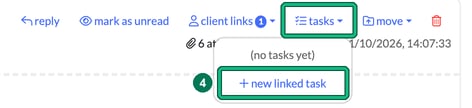
- Open the email and, from the email options, select tasks, then + new linked task. Engager first asks you to Choose client: pick one of the clients matched to the email addresses, use Choose another client from your database and select confirm, or select proceed without a client.
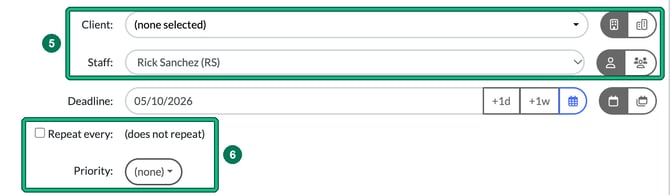
- In Create single or multiple tasks, you can select which staff member you want to assign the task to in Staff: and also select the client in question in Client:, if you’ve not LINKED your emails to that client.
- From here, define what you want the task to say / do / repeat etc. Details: is prefilled with the email, and you can tick Repeat every: to repeat the task. Mark it as high priority in Priority: too if needed, then select Save.
This is a much more effective way of operating, than say forwarding on an email for a team member to deal with it. It’s more action-based.
When you’re looking through the emails, we’ll even give you visual indicators of tasks assigned to that client that have been completed or due, which is again very handy when trawling through emails.
Seeing client emails outside of the integration
Any email, text, meeting or call log can be viewed by the CRM feature, within the client.
Once you’ve sent an email from the client’s account, or linked via the Email integration, it will be visible in the CRM.
- Simply open the client and, in the left-hand menu, select CRM > Communication.
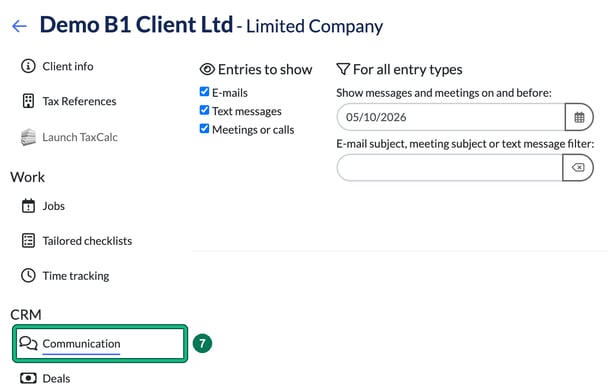
From here you can see the log of all interactions with the client, even the Auto Reminders! Use Entries to show to choose E-mails, Text messages or Meetings or calls, and filter by date or subject.
Although we’re not a CRM provider, we’ll still show you email logs, you can search, fire out emails or sms and even log calls / meeting outcomes against that record, using compose e-mail, compose text and log meeting or call.

Super handy and all part of what we do here at Engager!
Now you’re set up and raring to go, do you want to learn how to bulk send emails? See Bulk sending Emails.