
How to Edit a User / Reset Password
Adding users to your Engager account is quick and easy. Whether you're onboarding a new team member or setting up access for a temporary user, follow the steps below to get them up and running in no time.
Step-by-Step: Adding a New User
1. Access the User Settings
-
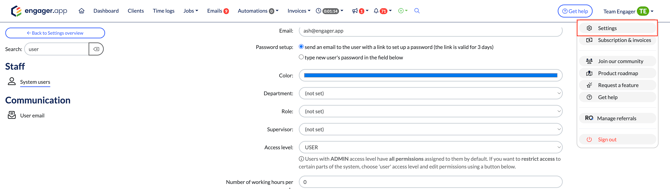
In the top-right corner of Engager, click on your name.
-
From the dropdown menu, select Settings.
2. Navigate to System Users
-
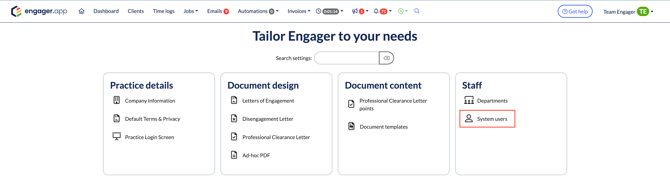
In the Settings menu, locate System Users.
-
Alternatively, use the search bar to quickly find “System Users”.
3. View Current Users and Add a New One
-
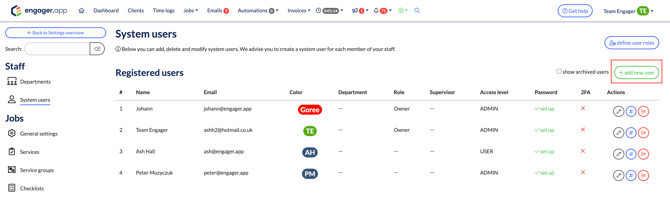
You’ll now see a list of all users currently in your Engager account.
-
Click Add New User to begin the setup.
4. Complete the User Details Form
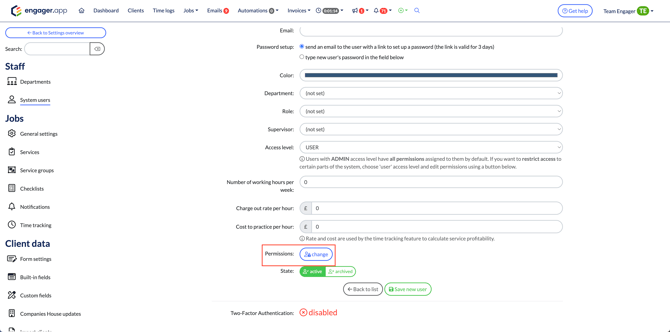
Fill in the required information, including:
-
Name
-
Email address
-
Colour assignment – this colour will appear anywhere their name or initials are displayed (e.g., in jobs, on client profiles, etc.).
-
Department – optional for internal categorisation.
-
Roles & Supervisor
-
Access Level – choose between admin, user, or restricted access.
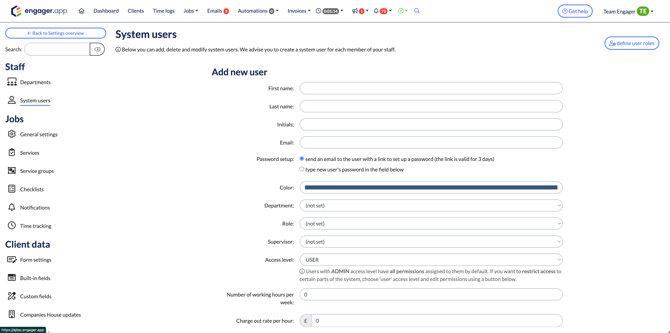
If you assign them as a User, you can also customise their specific permissions.
5. Define Time Tracking & Billing Settings
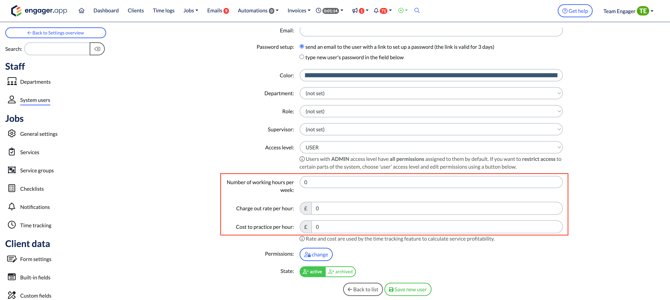
These are optional but useful for reporting and internal cost tracking:
-
Working hours per week
-
Charge-out rate per hour
-
Cost to practice per hour
These values are used in Engager's Time Tracking and Billing tools.
6. Set Permissions (For Users)
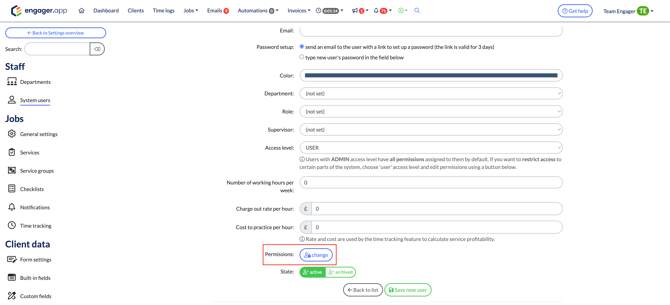
If the new user has a "User" access level, click into the Permissions tab to customise what they can and cannot do within Engager.
You’ll see a granular breakdown of system permissions, allowing you to tailor access based on their role.
7. Save and Send Login Instructions
-
Click Save to finalise the setup.
-
The new user will then be sent an email inviting them to setup their password.
Need Help?
If you have any questions, feel free to contact our team at contact@engager.app – we’re here to help!